How To: Use Z-Wave Controls
Did you know there’s a number of (perhaps less commonly known) ways to access and modify Z-Wave products that are connected to your Wink Hub?
They’re called Z-Wave Controls and they can be found and triggered in the Wink app.
Many of you have asked for more information about Z-Wave Controls, so we’re breaking each command down so you know exactly what they do and how they can make controlling your smart home more efficient than ever:
Accessing Z-Wave Controls
- Go to the main Hub page within the app.
- Select the settings icon in the upper right corner.
- Select your Wink Hub.
- Scroll down and select Z-Wave Controls.
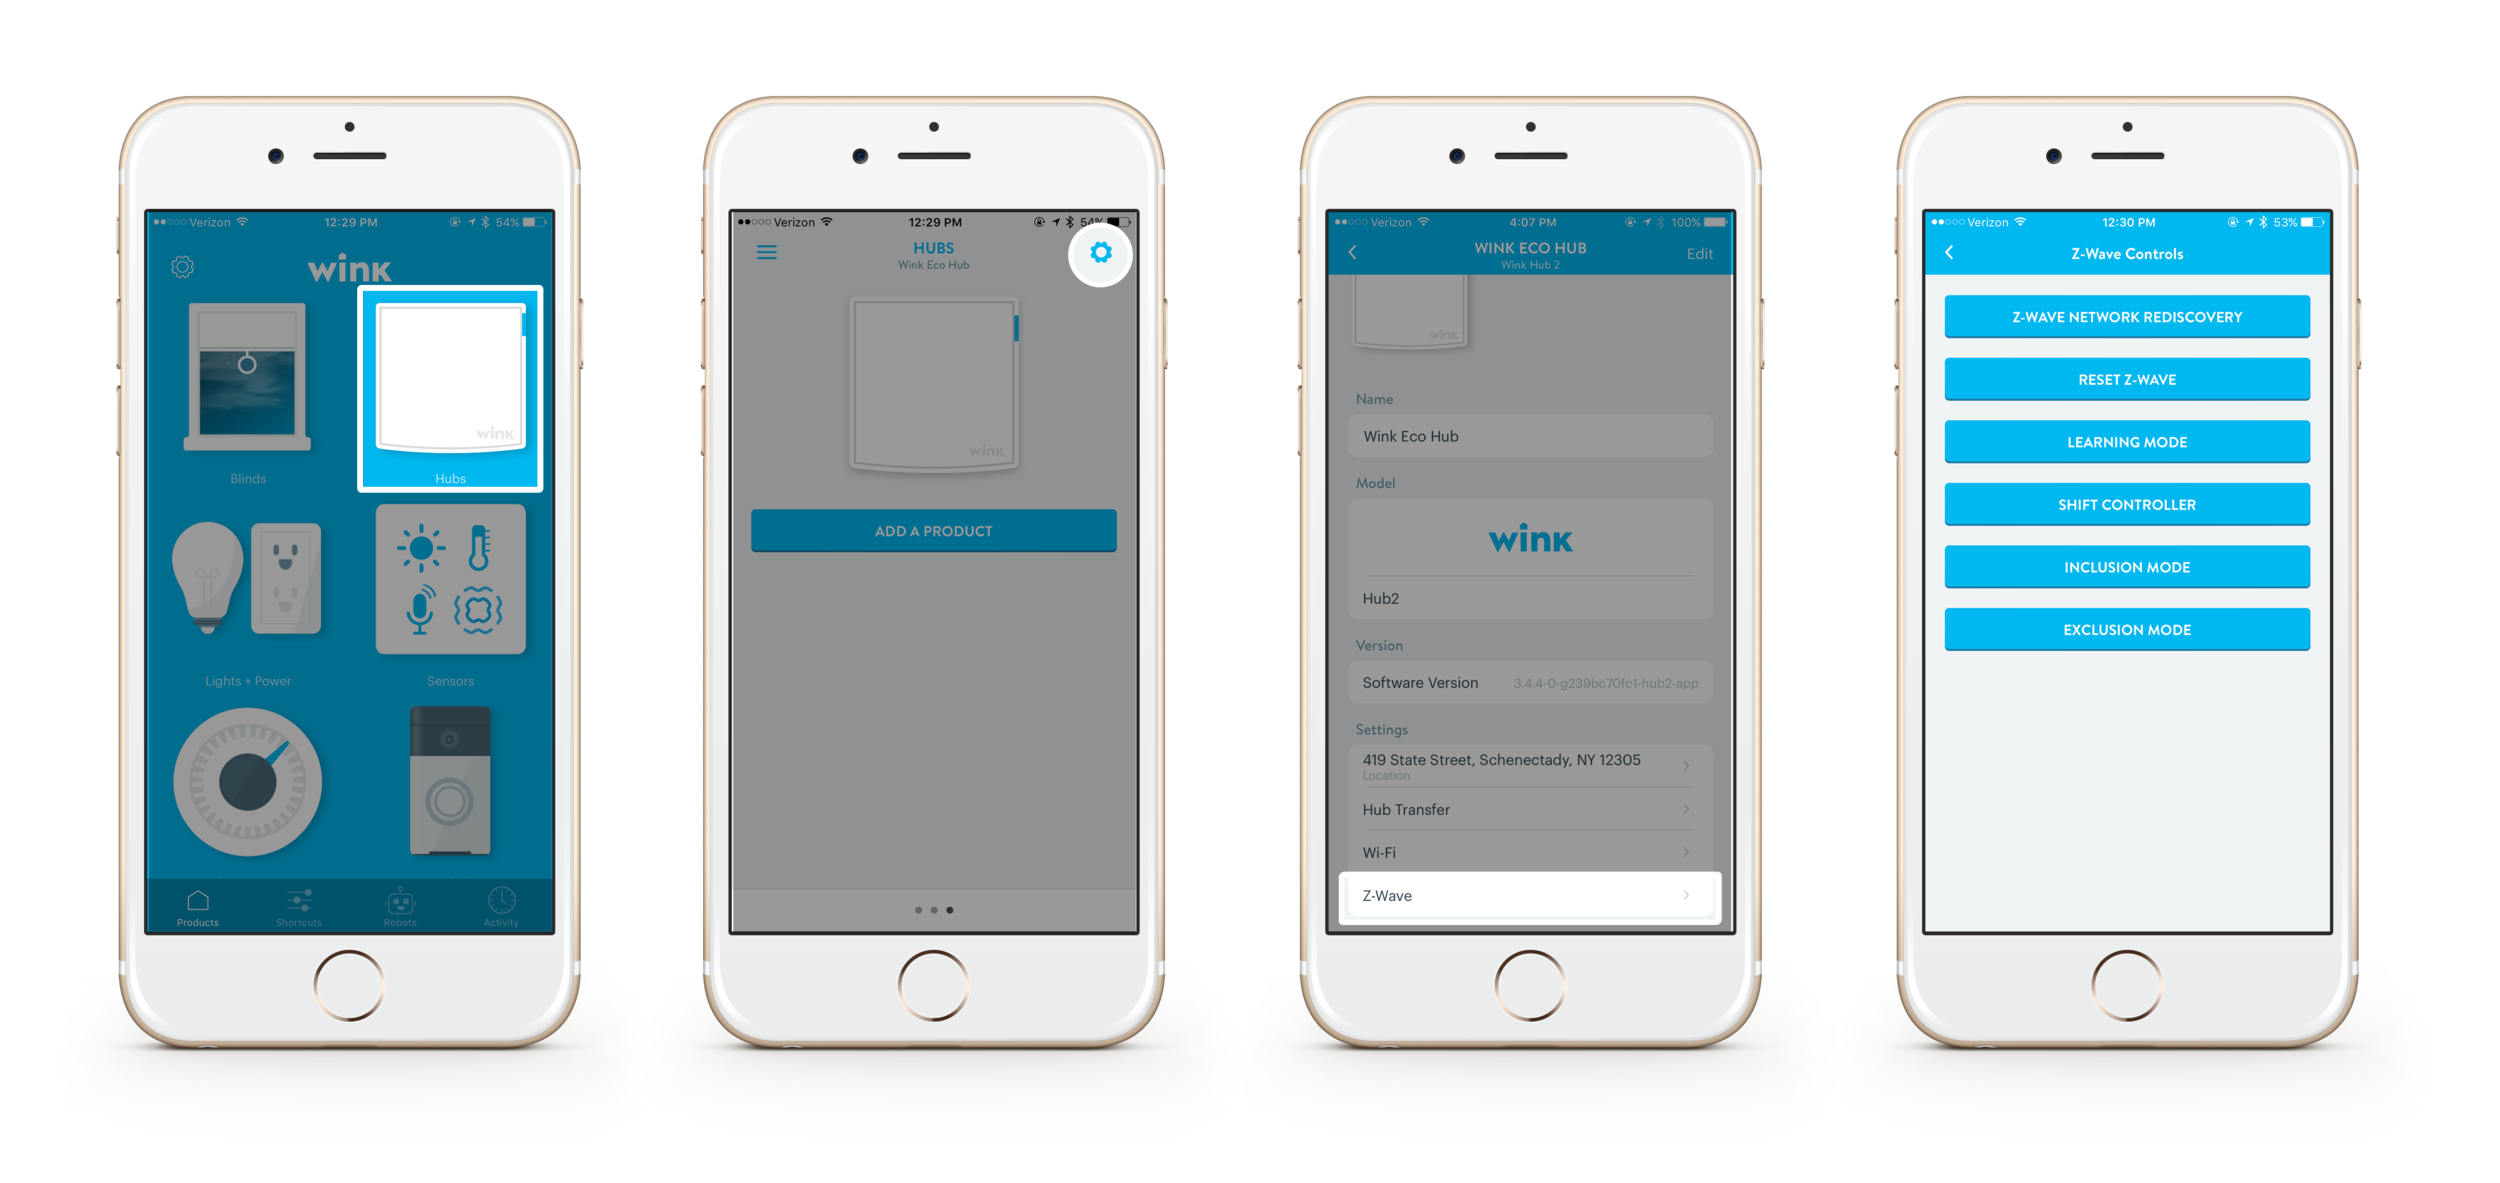
Z-Wave Network Rediscovery
Z-Wave Network Rediscovery prompts the Wink Hub to rediscover and redraw its map of the Z-Wave mesh network, and forces each connected device to update its own internal map of the mesh network.
Primary use case: You’re connecting new Z-Wave devices to Wink or moving existing ones to new locations and want to improve speed and reliability.
Caution: During a network rediscovery, large amounts of Z-Wave network traffic are created as each device rediscovers which other devices are nearby. During this process, normal commands (such as attempting to control a device) may not operate as reliably.
Reset Z-Wave
This command resets the Z-Wave routing table, effectively erasing all connected Z-Wave devices and corresponding automations.
Primary use case: You’re taking your Wink Hub to your new home but want to leave your Z-Wave products behind for the next occupant.
Caution: All Z-Wave devices and their automations will be removed from your Wink Hub and Wink account. After performing a reset, each Z-Wave device that was previously on the network will need to be individually excluded from the network before it can be included again.
Inclusion mode
Inclusion mode broadcasts a message from the Wink Hub to nearby Z-Wave devices saying it’s ready to connect a new product. This is essentially the same command that is sent when you reach the final step of the “Add a Product” instructions.
Primary use case: You’ve already paired a Z-Wave switch to the Wink Hub. Instead of going through the “Add a Product” instructions to connect a second or third switch, this button can be pressed along with the appropriate device-specific commands for faster setup!
Exclusion mode
Exclusion mode removes a Z-Wave device from the network.
Primary use case: If you have a Z-Wave product that was previously connected to a another platform’s hub, it must first be excluded before it can be added to the Wink Hub. By pressing “Exclusion Mode” the Wink Hub sends a message to the device telling it to forget its original network in preparation to join a new one.
Learning Mode & Shift Controller
Both Learning Mode and Shift Controller are more advanced commands. In short, Learning Mode allows the Wink Hub to be included into another Z-Wave controller’s network (including but not limited to Wink Hubs). Shift Controller transfers ownership from one Z-Wave Controller to another.